Last updated: August 18, 2026
Working out how to level a play area on a slope is a different problem from flattening a lawn that is already close to flat. On a real grade the soil has to go somewhere, the water has to go somewhere, and at some point the work stops being landscaping and becomes a structure that holds soil back.
This guide covers measuring the fall, the ways a sloped site gets tamed, and where a retaining edge turns into a job for a contractor. If your yard is only gently uneven, our guide to leveling ground for a playset covers that simpler case.
This article contains affiliate links. If you buy through them, we may earn a commission at no extra cost to you. Learn more.
Quick Answer
How do you level a play area on a slope?
- Measure first. Stakes, a taut string and a line level across the whole area you intend to surface tell you the total fall, and the fall decides the method.
- Small drops come out by cutting into the high side and compacting fill on the low side.
- Bigger drops call for a terrace: one level bench cut into the hill, held by a retaining edge, with the rest of the slope left as slope.
- The CPSC Outdoor Home Playground Safety Handbook advises choosing a level location because it reduces the likelihood of the play set tipping over and of loose fill washing away during heavy rains, and notes that some sites need re-grading.
Match the Method to the Fall
Measure the total fall across the whole area you plan to surface, not just under the frame. A gentle drop comes out by cutting and filling. Once the cut would leave the equipment sitting in a pit, or the fill on the low side gets deep, a terrace with a retaining edge becomes the practical route instead.
| Approach | Suits | What it involves | Where it stops |
|---|---|---|---|
| Cut and fill | Gentle falls across the marked area | Shave the high side toward the low corner, compact fill in shallow layers | When the cut sinks the play area into a hollow |
| One terrace | Moderate slopes where a single level bench fits | Cut a flat bench, hold the uphill face with timbers or blocks, drain behind it | Wall height, where permits and structural design begin |
| Two or more terraces | Long slopes with a lot of total fall | Steps of level ground linked by short walls or planted banks | Complexity, and a drop beside a play area needs its own thought |
| Moving the play area | Yards with a flatter corner going spare | Re-siting the equipment where the ground is already close to level | Only if the flatter spot gives the clearances the equipment needs |
Most sloped yards end up with a combination of the first two.
Measure the Slope Before You Move Any Soil
Drive stakes at the corners of the full area, run string between them, level one line with a line level, then measure down to the ground at intervals. The difference between the highest and lowest readings is the fall you have to deal with. Do this along both axes, since yards rarely fall in one clean direction.
Mark the whole use zone, not the footprint
The area that has to end up level is bigger than the equipment. The CPSC Public Playground Safety Handbook describes a use zone extending a minimum of 6 feet (1.8 m) in all directions from the perimeter of stationary equipment, and for swings a zone front and rear equal to twice the vertical distance from the pivot point to the surfacing. Stake that whole area out first, because it decides how much soil moves.

Cut the High Side, Do Not Build the Low Side
On a sloped site, cut more than you fill. Undisturbed soil holds the level you cut it to, while fill settles, and fill on a slope settles unevenly because the layer is thin at one end and deep at the other. Strip the turf across the whole area first, since grass buried under fill decomposes and takes your level with it.
Add whatever fill you do need in shallow layers, compacting each before the next. A single deep dump looks level on the day and is out by the second wet month, which on a slope means the downhill legs drop away first. Water the area, let one rain find the soft spots, then top up before assembly.

Terracing and Retaining Edges
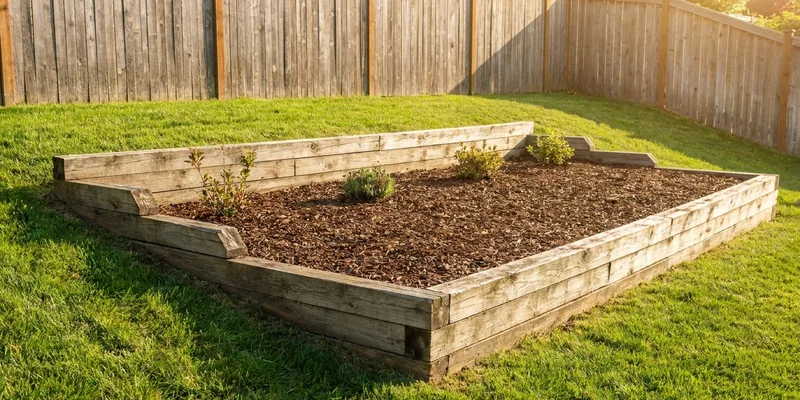
A terrace is the honest answer to a slope you cannot absorb. Rather than flattening the whole yard, you cut one level bench into the hill, hold the uphill face with a retaining edge, and use the material you cut to build out the downhill side. Size the bench to the full use zone, with a margin so the surfacing does not end at the lip of a drop.
Anything holding soil back also holds water back, so gravel behind the wall and an escape route for that water at the base are not optional extras. Saturated soil pushes far harder than dry soil, and walls that fail usually failed because water had nowhere to go.
When to hand it to a contractor
A low border holding a few inches of soil is landscaping. A wall holding back a real bank of earth is a structure, and above a certain height it typically needs a permit and an engineered design, with the threshold varying by county. Bring someone in when the bench needs a wall taller than knee height, when the cut exposes rock or water, or when the slope sits above a structure or a neighbor’s property.
Drainage on the Finished Bench
A slope drains itself. The moment you flatten part of it you have made a shelf that water arrives at from above and has to leave from somewhere, so leave a slight deliberate fall on the finished bench rather than a dead flat pad. The CPSC states that good drainage is essential to maintaining loose fill surfacing, and that standing water reduces its effectiveness and leads to compaction and decomposition.
Intercept what arrives from uphill with a shallow swale or drain line above the bench. Our guide to playground drainage and mud covers the fixes when water is already sitting there.
Surfacing and Anchoring Come Last
Leveling is preparation, not protection. The graded bench still needs protective surfacing across the whole use zone at the depth the equipment’s fall height requires, taken from the CPSC handbook rather than from a bag label, as our guide to playground surfacing depth explains.
Loose fill also needs containment at the perimeter, which matters more here because any residual fall moves it. Anchors go in last, once the fill has settled, since an anchor sitting in fresh fill is holding very little.
Common Mistakes to Avoid
- Leveling four pads under the legs. The frame stands level and everything around it still slopes, which is where children land and where surfacing migrates from.
- Building the low side up instead of cutting the high side down. Deep fill on the downhill side is the part that settles, and it settles unevenly.
- Treating a retaining wall as landscaping. Permits and drainage requirements exist because walls holding soil fail in ways low borders do not.
- Creating a dead flat bench. A shelf cut into a hill collects the water the hill used to shed.
Frequently Asked Questions
Can you put a playset on a slope? Not on the slope itself. The CPSC advises choosing a level location because it reduces the likelihood of the play set tipping over and of loose fill washing away during heavy rains. Level a bench for the equipment and its use zone instead.
How much slope is too much for a play area? There is no published figure, and your manual is where the manufacturer’s tolerance is stated. Practically, the question is whether you can reach level by cutting the high side without sinking the play area into a hollow.
Do I need a retaining wall for a sloped backyard playset? Only if the fall is more than cutting and filling can absorb. Where you do, treat it as a structure rather than an edging job and build drainage in behind it.
Do I need a permit to level a sloped yard? Moving soil usually does not, but building a retaining wall above a certain height often does, and that height varies by county. Homeowners association rules are separate again, so ask both.
How long should I wait before assembling on regraded ground? Long enough for one soaking rain to show where the fill has settled, then top up and recompact before anything goes together.
The Bottom Line
Stake out the whole use zone, measure the fall along both axes, and let the number decide the method. Cut the high side rather than filling the low side, compact everything you add, and step up to a terrace once cutting stops working. Build drainage into any wall, leave a slight fall on the finished bench, and check permit rules before building anything that holds soil back.