Last updated: August 18, 2026
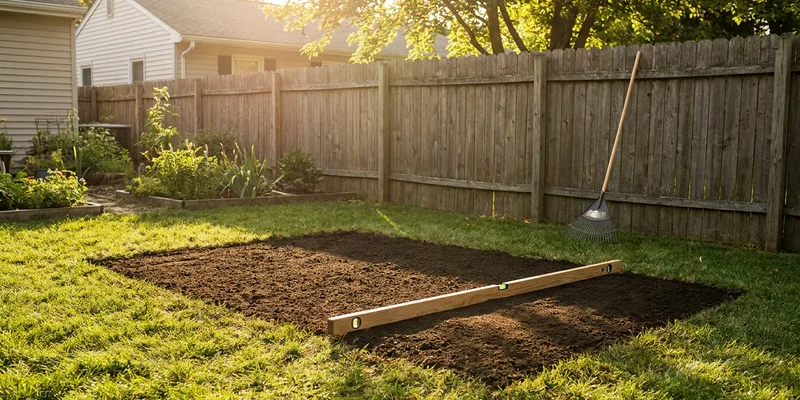
Learning how to level ground for a playset is the part of the project that arrives uninvited, usually on the morning the boxes do. Almost no lawn is truly flat, and a slope you cannot see when you walk across it becomes obvious the moment a rigid timber tower stands on it with one leg floating.
The work itself is not complicated: measuring, moving soil from the high side to the low side, and compacting what you moved. This guide covers the method, when a retaining edge becomes necessary, and what has to happen after leveling.
This article contains affiliate links. If you buy through them, we may earn a commission at no extra cost to you. Learn more.
Quick Answer
How do you level ground for a playset?
- Mark out the full area the playset needs, including the clear space around it, then find the drop with stakes, a taut string and a line level.
- Cut soil from the high side toward the level of the lowest corner rather than building the low side up on loose soil.
- Compact every layer of fill. Uncompacted fill settles over the first wet season and puts the tower back out of level.
- If the drop is more than the fill can absorb, build a retaining edge into the high side.
- Check your manual for the tolerance the manufacturer states, and level the whole use area, not just the footprint of the legs.
Leveling Methods Compared
The right approach depends almost entirely on how much drop you are dealing with across the marked area. The table below sets out what each method suits and where each one stops working.
| Method | Best for | What to know |
|---|---|---|
| Cut and fill by hand | Gentle slopes across a small to medium area | The standard approach. Move soil from the high side to the low side, compacting fill in layers as you go |
| Retaining edge plus fill | Slopes too steep to absorb by cutting alone | Timbers, blocks or a border hold the fill in place. Check with your local building department before building anything substantial |
| Leaving the slope | Very slight drops only | Sometimes honest and correct. Check the tolerance in your manual before deciding the ground is close enough |
Whichever route you take, level the whole area rather than four small pads under the legs. Leveling only the footprint leaves the surrounding ground sloped, which is where children actually land.
Why a Level Base Matters More Than It Looks
A playset is a rigid frame. On uneven ground it goes together under tension, which shows up as bolt holes that will not align, gates that bind, and a tower that racks under load. That stress does not go away, and it concentrates at the joints the structure depends on.
The second reason has nothing to do with the frame. Protective surfacing only works if it stays at the depth you put it, and on a slope loose fill migrates downhill with every rain and every landing, thinning out at the end of a slide or under a swing.
Level the area, not just the legs
The area you need to level is bigger than the equipment. The CPSC Public Playground Safety Handbook describes a use zone extending a minimum of 6 feet (1.8 m) in all directions from the perimeter of stationary equipment, and for swings a zone extending front and rear twice the height of the pivot point measured from the ground. Mark that whole area with stakes before you dig.
Step by Step: Cut and Fill by Hand
This method covers most residential yards. Work on a dry day, since wet soil compacts poorly and is heavier to move, and give yourself the whole day rather than squeezing it in before assembly.
The steps
- Mark the area. Drive stakes at the corners of the full area including the clear space around the equipment, and run string between them.
- Find the drop. Pull one string taut and level with a line level, then measure down to the ground at intervals. The largest measurement is your low point.
- Strip the sod. Lift turf across the whole area. Grass left under fill becomes a soft layer that decomposes and settles.
- Cut the high side. Dig down toward the level of the low corner. Cutting beats filling wherever you have the choice, because undisturbed soil does not settle.
- Fill the low side in layers. Add soil in shallow layers rather than one deep dump, compacting each with a hand tamper before the next.
- Recheck with the string. Measure down from the taut string at several points until the readings match.
- Water and let it settle. One good rain shows where the fill drops. Top up and recompact before assembly, not after.

When You Need a Retaining Edge
Once the drop is more than you can take out by cutting into the high side without ending up in a hole, you need something to hold the material in place: a retaining edge on the uphill side, built from landscape timbers or blocks, with the fill compacted behind it.
This is where the job changes character. A low border holding a few inches of fill is landscaping; anything taller is a structure that has to resist soil pressure and drain properly. Retaining walls above a certain height often require a permit, and that threshold varies by county, so ask your local building department rather than guessing. The same goes for HOA rules.
Drainage and the Base Layer
A perfectly level area that holds water is a downgrade, not an upgrade. If your site is wet, the finished area should shed water gently to one side rather than sitting as a flat basin, and that shallow fall is still compatible with a frame that stands level.
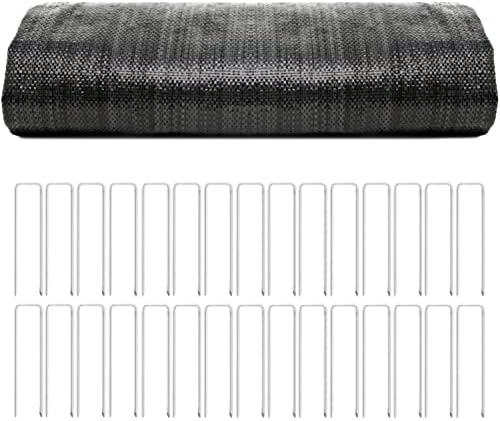
On soft or persistently wet ground, a compacted gravel base over landscape fabric gives a stable, draining platform under the surfacing. It stops the legs sinking and keeps loose fill out of the mud.
Surfacing Comes After Leveling
Leveling is preparation, not protection. The area still needs protective surfacing across the whole use zone, and that is the layer doing the safety work. The CPSC Public Playground Safety Handbook sets out which materials are suitable and the depths they need for the critical height of the equipment, so take your depth from the handbook rather than a bag label.
Loose fill needs containment at the edges to hold that depth, another reason to build a border while the tools are out. Our comparison of rubber mulch and wood mulch covers how the options behave.
Common Mistakes to Avoid
- Leveling only the footprint of the legs. Children land around the equipment, and loose surfacing migrates on any slope you leave.
- Filling instead of cutting. Undisturbed soil holds its level. Fill settles, and fill over grass settles more.
- Skipping compaction. Uncompacted fill looks perfect on assembly day and is out of level by the second wet month.
- Creating a flat basin. A level area with nowhere for water to go puddles after every rain.
- Treating leveling as the safety step. The protective surfacing over the use zone absorbs a fall, and it goes on afterward.
Frequently Asked Questions
How level does the ground need to be for a playset? Follow the tolerance stated in your playset’s manual, since manufacturers differ and the manual is what your warranty refers to. In practice, remove any drop large enough to leave a leg floating or to make bolt holes fight you during assembly.
How big an area do I need to level? More than the equipment footprint. The CPSC Public Playground Safety Handbook describes a use zone of at least 6 feet (1.8 m) in all directions around stationary equipment, and a larger zone front and rear of swings, equal to twice the height of the pivot point.
Do I need to remove the grass first? Yes, across the whole area. Fill placed over turf sits on a layer that decomposes and compresses, so the surface you leveled drops away over the following months.
What goes on top once the ground is level? Protective surfacing across the entire use zone. The CPSC Public Playground Safety Handbook lists suitable materials and the depths required for a given equipment height, and that depth does the work in a fall.
Do I need a permit to level ground for a playset? Moving soil generally does not, but building a retaining wall may, depending on height and your county’s rules. Check with your local building department and your homeowners association first.
The Bottom Line
Mark out the whole use area, find the drop with stakes and a string level, cut from the high side rather than filling the low side, and compact every layer you add. Let it settle and check again before assembly. Then treat the leveled ground as a foundation rather than a finish: it is the surfacing on top, at the depth the CPSC handbook specifies, that protects anyone.