Last updated: August 18, 2026
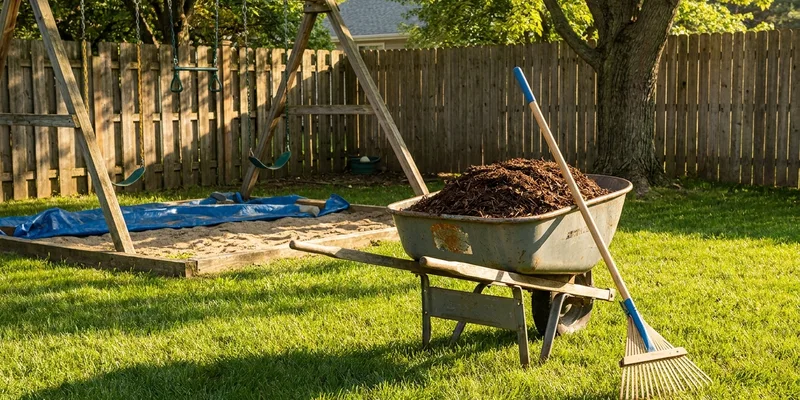
Learning how to install playground mulch is mostly about the order of the layers, because every step you skip shows up later as depth you no longer have. The material itself is the easy part. The base under it, the border around it and the depth you fill to decide whether the surface still protects anyone in two years.
This walkthrough goes layer by layer, from marking out the area to the check you do a month after the last barrow. Every depth and distance quoted here comes from the CPSC handbooks, and where a number depends on your own equipment it says so.
This article contains affiliate links. If you buy through them, we may earn a commission at no extra cost to you. Learn more.
Quick Answer
How do you install playground mulch?
- Mark the full use zone first, excavate and level the base, set the border, lay permeable geotextile, then spread the mulch and rake it out.
- Fill deeper than your target. The CPSC Public Playground Safety Handbook notes loose fill compresses at least 25 percent over time, and gives the example that a playground needing 9 inches of wood chips should be filled to 12 inches initially.
- The target depth itself comes from your material and your fall height, not from a rule of thumb. The handbook advises never using less than 9 inches of loose fill, with shredded or recycled rubber the exception at 6 inches.
- Mark the minimum fill level on the support posts before you finish, so future checks are a glance rather than a measurement.
The Layers, In Order
A play surface is a stack, and each layer only works if the one below it was done first. The table below is the whole job in sequence. Read it before you order anything, because two of the layers change how much material you need.
| Layer | What it does | What to get right |
|---|---|---|
| 1. Marked out area | Defines the use zone you are surfacing | The full CPSC use zone, not the footprint of the frame |
| 2. Excavated base | Gives the bed somewhere to sit without a raised lip | Level, roots and stones out, water draining away from the area |
| 3. Border | Holds the depth in place for years | A profile tall enough for the finished depth, anchored into undisturbed soil |
| 4. Geotextile | Separates mulch from soil and suppresses weeds | Permeable fabric, never solid sheeting; seams overlapped and pinned |
| 5. Mulch | Absorbs the impact of a fall | Filled above target depth so it settles into the rating, raked level |
| 6. Depth marks | Makes the yearly check trivial | Minimum fill level marked on the support posts |
Step 5 is the one with a number attached, and that number is not universal. Our guide to how deep playground surfacing should be sets out the CPSC table that pairs each material with the fall height it protects.
Step 1: Mark Out the Use Zone
Mark the surfaced area before you touch a shovel, because it is always larger than people expect and it sets every quantity afterwards. The CPSC Outdoor Home Playground Safety Handbook advises extending surfacing at least 6 feet from the equipment in all directions, and further to the front and rear of swings, a distance equal to twice the height of the top bar from which the swing is suspended.
Lay the outline out with marking paint or a garden hose, then walk it. For tire swings the handbook recommends a circle whose radius equals the height of the suspending chain or rope plus 6 feet in all directions.
Step 2: Excavate and Level the Base
Strip the turf and dig down inside your outline to roughly the depth of the finished bed, so the mulch ends up flush with the surrounding lawn rather than mounded above it. Pull out roots and stones, break up compacted soil so water can move through it, and rake the base flat.
Get drainage right at this stage or not at all. The CPSC handbook warns that standing water reduces surfacing effectiveness and leads to compaction and decomposition, so the base should shed water rather than hold it. On a slope, the levelling job is a different problem and is covered separately in our guide to levelling a play area on a slope.
One thing you cannot dig your way out of
Do not build over a hard surface. The CPSC Outdoor Home Playground Safety Handbook advises against installing home playground equipment over concrete, asphalt or any other hard surface, and against installing loose fill surfacing over hard surfaces. Grass and dirt do not count as protective surfacing either, which is the whole reason for the excavation.
Step 3: Set the Border Before the Fabric
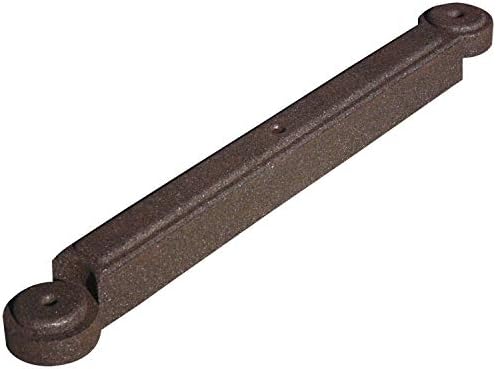
The border goes in next, while the base is still bare and easy to work on. Dig a shallow trench along the marked line, seat the edging so its top sits at or just above the finished mulch level, drive the anchor spikes at an angle into undisturbed soil outside the trench, and backfill and tamp behind it.
Retrofitting a border later means digging a trench through material you have already spread, and the line ends up following the mulch instead of the use zone. Choosing a profile that suits a deep bed rather than a flower bed is the whole decision, and our guide to playground border edging covers what to check.
Step 4: Lay Permeable Fabric
Roll geotextile across the base, overlap every seam generously, and pin along the seams as well as the perimeter. Run it out to the border and slightly up behind it, because that junction is where weeds appear first. Cut a slit around each support post rather than a hole, then overlap and pin the cut closed.
The fabric must pass water. Solid plastic sheeting turns the base into a tray, which is exactly the standing water problem the handbook warns about. Get the mulch on soon after, since exposed fabric degrades at the edges in sun and lifts in wind.

Step 5: Spread to the Depth That Settles Into the Rating
Bring the material in and rake it out evenly, then keep going past the number you looked up. The CPSC Public Playground Safety Handbook states that loose fill materials compress at least 25 percent over time and works the example through itself: if the playground will require 9 inches of wood chips, the initial fill level should be 12 inches.
The home handbook repeats the point for backyards, noting that an initial fill level of 12 inches will compress to about a 9 inch depth over time, and that surfacing should be periodically refilled to maintain at least a 9 inch depth. Shredded and recycled rubber is the exception the handbook flags: it does not compress in the same manner, though it still displaces.
Which number you are aiming for
That depends on your material and your fall height, which for swings the CPSC measures from the pivot point at the top bar rather than from the seat. The handbook advises never using less than 9 inches of loose fill, with shredded or recycled rubber recommended at 6 inches, and for home equipment less than 4 feet high the home handbook allows a 6 inch minimum. Below 6 inches, it says, protective material is too easily displaced or compacted.
Step 6: Mark the Level and Check It Again
Before you put the rake away, mark the minimum fill level on the equipment support posts. The CPSC suggests exactly this, and it turns every future depth check into a glance from the kitchen window rather than a job with a tape measure.
Then check the area again after a few weeks of real use. The handbook calls for frequent maintenance so levels never drop below the minimum depth, and singles out the areas under swings and at slide exits as the most susceptible to displacement. Raking compacted surfacing back into the hollows is treated as its own task, separate from topping up.
Mistakes That Undo the Work
- Filling to the listed depth. Those figures are compressed depths, and the handbook’s own example fills 12 inches to end up at 9.
- Laying mulch straight onto grass. The turf breaks down, the bed settles unevenly, and the depth you measured on day one was never real.
- Solid plastic under the mulch. It traps water, and standing water is what the CPSC links to compaction and decomposition.
- Surfacing only the footprint. The use zone extends at least 6 feet in all directions and further behind swings.
- Border last. It becomes a retrofit through spread material, and the perimeter ends up wherever the mulch happened to stop.
- No follow up check. The first month of use is when the layer settles and the wear spots appear.
Frequently Asked Questions
How do you install playground mulch step by step? Mark the use zone, excavate and level the base, set the border, lay permeable geotextile, spread the mulch above your target depth, then mark the minimum level on the posts and check it after a few weeks of use.
How deep should I fill playground mulch? Deeper than the finished figure. The CPSC handbook notes loose fill compresses at least 25 percent over time and gives the example of filling to 12 inches where 9 inches of wood chips is required.
Do I need to remove the grass first? Yes. Grass and dirt are not protective surfacing according to the CPSC home handbook, and turf left underneath decomposes and lets the bed settle unevenly.
What goes under playground mulch? A levelled, draining base and a permeable geotextile fabric. Never solid plastic sheeting, and never a hard surface such as concrete or asphalt.
When do I need to top it up? Whenever the depth drops below the minimum you installed to. The CPSC calls for frequent maintenance and points to the areas under swings and at slide exits as the first to thin out.
Does the depth change in winter? The performance can. The CPSC notes that critical height may be reduced during winter in areas where the ground freezes, so a frozen surface absorbs less than the same layer in summer.
The Bottom Line
Work from the bottom up and the surface looks after itself: use zone marked, base levelled and draining, border anchored, permeable fabric pinned, then material filled well above the target so it settles into the depth the CPSC table pairs with your fall height. Mark the minimum level on the posts, come back after a month of real use, and rake the hollows under the swings before they turn into the thin spot that matters.