Last updated: August 18, 2026
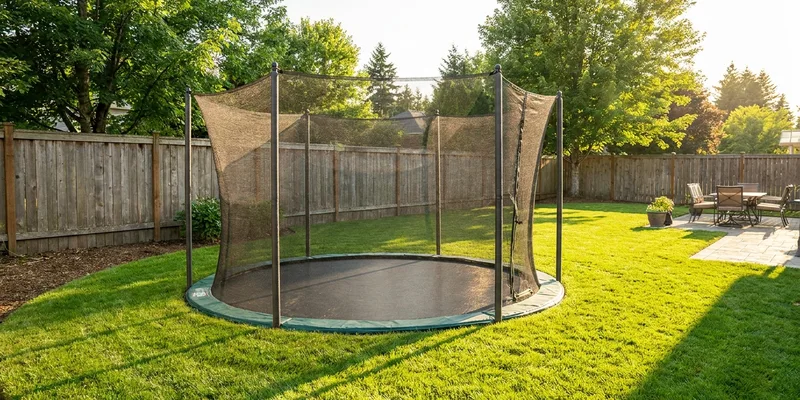
An in-ground trampoline kit is really two purchases in one: the trampoline, and the below grade structure that keeps a hole in your yard from turning into a pond. Most of the disappointment people report with sunken trampolines traces back to the second part, not the first.
This guide covers what a proper kit includes, why drainage and airflow decide whether the installation works, how retaining wall options differ, and where the digging job gets more involved than the product photos suggest.
This article contains affiliate links. If you buy through them, we may earn a commission at no extra cost to you. Learn more.
Quick Answer
What do you need in an in-ground trampoline kit?
- A purpose built in-ground trampoline with a vented mat or ventilated pad, since a standard above ground unit dropped into a hole traps air and bounces poorly.
- A retaining structure to hold the soil back, either the manufacturer’s own wall system or a wall you build from block or treated timber.
- A drainage plan, which for most yards means a gravel base and often a sump with a pump, because water finds the lowest point and that is now your trampoline.
- Call the national 811 service before you dig so buried utilities get marked, and check with your own county and homeowners association about any local requirements.
What an In-Ground Kit Actually Includes
Kits vary widely in how much of the job they cover. Some ship only the trampoline and assume you will build the hole yourself; others include a full modular wall. The table sorts the components so you can see what is missing from a listing before it arrives.
| Component | What it does | What to look for |
|---|---|---|
| Ventilated mat or pad | Lets air escape on the down bounce so the mat does not act like a piston | A mat with perforations or a frame pad designed with vents, stated explicitly for in-ground use |
| Retaining wall system | Holds the excavated soil back from the frame | Modular panels sized to the trampoline diameter, or clear specifications so you can build your own |
| Frame and feet | Carries the load and sets the mat flush with the lawn | Galvanized steel rated for outdoor burial conditions, with a stated finished height above grade |
| Drainage provision | Keeps the pit from holding water after rain | A specified gravel depth, and a sump location if the manufacturer expects a pump |
| Enclosure option | Sold separately on many in-ground models | An enclosure designed for the in-ground version, since ground level poles mount differently |
| Ground level pad | Covers the gap between mat and lawn edge | A pad that seals the perimeter so feet and debris do not drop into the pit |
If you are still weighing whether to sink one at all, our in-ground versus above-ground comparison lays out the trade-offs side by side before you start digging.
Drainage and Airflow: the Two Things That Sink These Projects
A trampoline pit is a hole in your yard, and holes collect water. Unless your soil drains fast and the site sits high, you need a gravel base and usually a low point where water can be pumped or piped away. Owners who skip this discover it the first time a heavy storm leaves standing water under the mat, which then breeds mosquitoes and rots the frame padding.
Airflow is the second issue and the one people do not see coming. A trampoline mat pushing down into an enclosed pit compresses the air beneath it, which kills the bounce and stresses the mat. Purpose built in-ground models solve this with a perforated mat, a vented pad, or a wall design that leaves an air gap around the perimeter. A standard above ground trampoline lowered into a hole does none of that.
Testing Your Site Before You Commit
Dig a test hole a couple of feet deep in the intended spot, fill it with water, and see how long it takes to drain. Slow drainage means clay, which means a sump and a pump rather than a gravel base alone. It is a cheap test that changes the whole plan, and it is far easier to run before the trampoline is on your driveway.
Retaining Wall Options
The wall keeps soil out of the pit and holds the trampoline frame at the right height. Manufacturer supplied modular walls are the simplest route because they arrive sized to the trampoline and need no cutting or mortaring. They cost more than a wall you build, and they lock you into that manufacturer’s diameter.
Built walls fall into two camps. Concrete block or retaining wall block gives the most durable result and handles wet soil well, but it is real masonry work. Treated timber is faster and forgiving on a sloped site, though it will need inspecting for rot every few seasons. Either way the wall has to hold back soil permanently, so this is not a place for scrap lumber.
Our Top Picks at a Glance
How we chose: we compared widely available in-ground trampolines and pit components on whether the mat or pad is genuinely vented for below grade use, whether a retaining structure is included or specified, and how consistently owners report drainage holding up after a full wet season. Selections lean on manufacturer specifications and recurring review themes rather than any hands-on trial of our own.
🏆 Best Overall Kit
A 14 foot in-ground trampoline sold with its own retaining wall system and a ventilated pad, the configuration that removes most of the guesswork from the pit build.

📐 Best for Mid-Size Yards
A 12 foot in-ground trampoline with a vented mat, which fits a typical suburban lawn while keeping the excavation manageable.

🛡️ Best Enclosure Add-On
A safety enclosure designed for a ground level frame, since standard above ground net poles do not mount correctly on a sunken trampoline.

Picks by Situation: Wet Sites and Clay Soil
Two site conditions call for extra hardware before the trampoline goes anywhere near the hole: soil that holds water, and a yard where the low point is exactly where the kids want the trampoline.
💧 Best for Poor Drainage
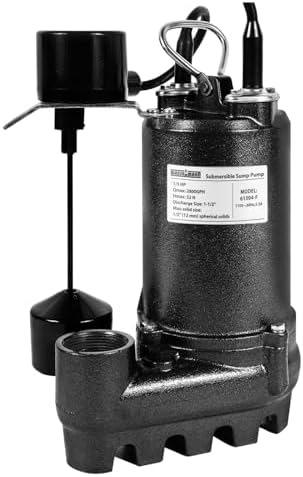
A submersible sump pump with a float switch, sized for a small pit, which is the standard answer where a gravel base alone will not clear standing water.
🧱 Best Wall Liner
Heavy duty landscape fabric to line the excavation behind the wall, keeping soil from washing through joints and silting up the drainage layer.

Digging and Ground Prep
Contact the national 811 call-before-you-dig service before breaking ground so buried utility lines get located and marked. That step is free, it is standard practice across the United States, and a trampoline pit is deep enough to matter. Permits, setback rules and homeowners association requirements vary by county and by association, so check locally rather than assuming.
Expect the excavation to be a bowl rather than a cylinder on most designs, deeper at the center than at the rim, which is what gives the mat room to travel. Follow the manufacturer’s depth profile rather than digging a flat bottomed hole. The same levelling logic applies to any large play structure, and our guide on levelling ground for a playset covers the grading side in more detail.
Common Mistakes to Avoid
- Burying a standard above ground trampoline. Without a vented mat or pad the trapped air kills the bounce and stresses the mat. Buy a model specified for in-ground use.
- Treating drainage as optional. Run a percolation test first. A pit that holds water after every storm becomes a maintenance problem you cannot easily undo.
- Digging a flat bottomed hole. The mat needs travel room at the center, so follow the manufacturer’s depth profile rather than a uniform depth.
- Skipping the utility locate. Call 811 before you dig. This is not a formality on a pit this deep.
- Assuming the enclosure carries over. Ground level frames need enclosures made for them, and the net is not usually included with the trampoline.
- Forgetting that the pit is permanent. Moving an in-ground trampoline means backfilling a hole and starting over, so settle the location before the first shovel goes in.
Frequently Asked Questions
Can you put a regular trampoline in the ground? Not successfully. A standard above ground mat has no way to release the air it pushes into an enclosed pit, so the bounce suffers and the mat takes more stress. In-ground models use a perforated mat, a vented pad, or a perimeter air gap to solve exactly that.
Do in-ground trampolines need drainage? In most yards, yes. A gravel base handles fast draining soil, while clay or a low lying site usually needs a sump and a pump. Test how quickly a test hole drains before you decide.
How deep does the hole need to be for an in-ground trampoline? It depends on the model, and manufacturers publish a depth profile that is deeper at the center than at the rim. Follow that profile rather than a single number, since the mat needs travel room underneath.
Do you need a retaining wall for an in-ground trampoline? Yes. Bare soil walls collapse into the pit over time. Use the manufacturer’s modular wall system, or build one from retaining wall block or treated timber rated for ground contact.
Are in-ground trampolines safer than above ground ones? They remove the height of the fall off the frame, but they do not remove the main injury risks. CPSC trampoline safety guidance still applies: one person on the trampoline at a time, no somersaults, and pads that fully cover the springs, hooks and frame.
Do you need a permit to install an in-ground trampoline? That depends entirely on your county and any homeowners association rules, which is not something we can answer for your address. Check with your local building department and your association before you dig, and call 811 to have utilities marked either way.
Do in-ground trampolines still need an enclosure net? Many owners fit one, and enclosures made specifically for ground level frames are sold separately. The consumer standard for trampoline enclosures is ASTM F2225, which manufacturers who follow it usually state on the listing.
The Bottom Line
Buy an in-ground trampoline that was designed to be buried, not a standard unit and a shovel. Budget your effort for the pit rather than the product: a percolation test, a gravel base or a sump, a proper retaining wall, and a depth profile that follows the manufacturer’s drawing. Get those right and the trampoline part is the easy half.