Last updated: August 18, 2026
A zip line kit for backyard use is one of the few pieces of play equipment where the hardware in the box is only half the purchase. The other half is the run itself: two solid anchor points, a clear path, and a braking arrangement that stops a rider before the end of the cable rather than at it.
This guide covers what to check on a kit before you order, how cable, trolley and seat choices change the ride, why the brake is the part most buyers underestimate, and how to handle anchoring and the landing area.
This article contains affiliate links. If you buy through them, we may earn a commission at no extra cost to you. Learn more.
Quick Answer
Which zip line kit should you buy for a backyard?
- Buy a complete kit that includes a braking system rather than adding a brake later, since the brake is the component that decides how the ride ends.
- Measure your run first. Cable length, slope, and the clear path on either side all have to work before the kit specification matters.
- Use tree saver straps rather than bolting or wrapping cable directly around a trunk, and follow the manufacturer’s stated instructions for tension, height, and clearance instead of a figure you found online.
What to Check on a Zip Line Kit Before You Buy
A backyard zip line is a system, and the weakest component sets the limit for the whole thing. Each row below can be confirmed from the listing or the manual before you pay, and each is a common reason a kit gets taken down after one season.
| What to check | Why it matters | What to look for |
|---|---|---|
| Braking system | Decides whether a rider slows before the end anchor or arrives at it | A spring brake or bungee brake included in the kit, with the stop position adjustable along the cable |
| Cable and hardware rating | Cable diameter and turnbuckle rating set the real weight limit | Galvanized aircraft cable with a stated diameter, plus a weight capacity given by the manufacturer |
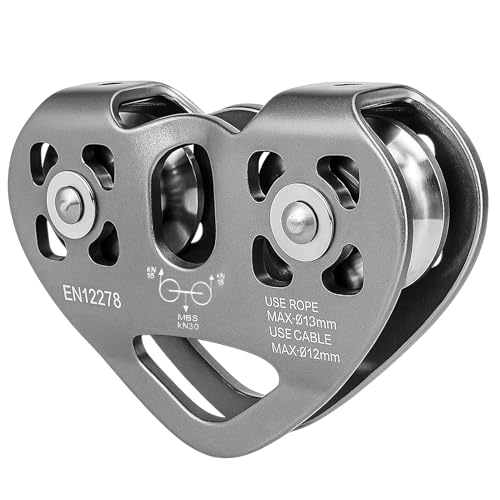
| Trolley design | A rough trolley makes short, jerky rides and wears the cable | Sealed bearings or shielded pulleys, and a body sized for the cable diameter supplied |
| Seat or handlebar type | Younger riders cannot hold a bar for the length of a run | A seat or harness style for smaller children, a handlebar or grip trolley for older ones |
| Anchoring method | Tree damage and pulled anchors are the two failure modes | Tree saver straps included, or explicit instructions for a post installation |
| Installation instructions | Every safety figure that matters is model specific | A manual that states cable height, slope, tension, rider weight limits, and the required clear path |
If your yard has no usable run, a ground level obstacle line beats forcing a short zip line. Our guide to the ninja line for kids covers that alternative.
Cable Length, Slope, and the Path Underneath
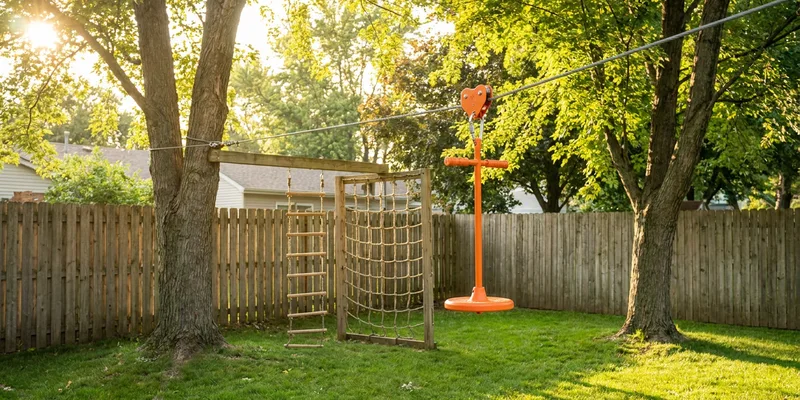
Start with the run, not the kit. You need two genuinely solid anchor points, a usable slope, and a corridor along the whole cable that is clear of branches, fence posts, sheds, and anything else a rider’s leg can reach at speed. If that corridor does not exist, no kit fixes it.
Kits are sold by cable length, and buying more length than your run needs is not a bonus. Excess cable has to be managed at the anchor. Measure the distance between your two anchor points, then buy the length band that covers it with the slack allowance the manual describes.
Ground clearance and the landing area
The cable sags under a rider, so the clearance you see with an empty line is not the clearance a child gets. Manufacturers state a minimum installed height and a slope for exactly this reason, and those figures vary by kit, cable diameter, and rider weight, so take them from your own manual. The CPSC Public Playground Safety Handbook, which covers public playground track rides, calls for a clear use zone around equipment and treats the space a rider travels through as part of that zone. Keep the whole corridor and the landing area clear rather than only the ends.
Braking: The Part Most Buyers Underestimate
The brake is the difference between a ride that ends in a controlled stop and one that ends against the end anchor. Two arrangements are common: a spring brake, a heavy compression spring on the cable ahead of the end stop, and a bungee brake, which uses an elastic line to pull the trolley back after a set point.
Neither is a safety feature you can improvise. The stop position, spring rating, and bungee length are matched to the kit, and moving the brake toward the end anchor for a longer ride is the modification people most often regret. Set it where the manual says, then test the rider weights that will actually use the line.
Testing before a child rides
Run the trolley down the line loaded with something heavy before anyone gets on, and repeat until the stop point is consistent. Exceed the stated weight capacity and both the braking behavior and the cable sag change, which is why adults riding a line rated for children is a separate mistake.

Anchoring to Trees or Posts Without Damage
Cable wrapped directly around a trunk cuts into bark and eventually girdles the tree, which is why tree saver straps exist and why most reputable kits include them. Straps spread the load across a wide band of bark and come off at the end of the season without leaving hardware in living wood.
Whether a given tree is a suitable anchor at all is a question for a certified arborist, since trunk diameter, species, root condition, and lean all matter. Where trees are not available, purpose built posts set according to the kit manufacturer’s instructions are the alternative, and those instructions are the source for depth and footing details.

Our Top Picks at a Glance
How we chose: we compared widely available backyard zip line kits on whether a brake is included, cable and hardware ratings, trolley quality, and how consistently owners report a controlled stop after installation. Selections lean on manufacturer specifications and recurring themes in customer reviews rather than any hands-on trial of our own.
🏆 Best Overall
A complete kit with galvanized aircraft cable, a sealed bearing trolley, a spring brake, and tree saver straps, so nothing safety critical is left for you to source.

🧒 Best for Younger Riders
A kit supplied with a seat rather than a bare handlebar, which suits children who cannot hold a grip for a full run.

⚙️ Best Trolley Upgrade
A replacement trolley with sealed bearings, worth buying when an older kit runs rough and the cable itself is still in good condition.
Seasonal Checks
A zip line lives outdoors under tension, so it needs a real inspection rather than a glance. Before the first ride of the season, check the cable for broken strands and kinks, the clamps for slippage, the turnbuckle for corrosion, the trolley bearings for grit, and the straps for cuts or UV damage.
Trees also move, so an anchor that was solid two years ago can have new lean or dead limbs above the run. Many manufacturers recommend releasing tension or removing the line over winter, which is worth doing where the manual says so.
Common Mistakes to Avoid
- Moving the brake to get a longer ride. The stop position is matched to the kit. Shifting it toward the end anchor removes the margin the design depends on.
- Wrapping cable straight around a trunk. It cuts bark and can girdle the tree. Use the tree saver straps supplied, or the post method the manufacturer describes.
- Ignoring the stated weight capacity. Adults on a kit rated for children change both the sag and the braking behavior.
- Clearing only the ends of the run. A rider passes through the entire corridor, and a branch or fence post halfway along is exactly where a leg finds it.
- Leaving it tensioned and unchecked all year. Cable, clamps, straps, and trees all change over a season.
Frequently Asked Questions
Are backyard zip lines safe for kids? They can be, when the kit is installed to the manufacturer’s stated height, slope, and tension, the brake is left where the manual places it, and the corridor stays clear. Most reported problems trace back to a modified brake, an overloaded line, or an obstruction along the path.
How long should a backyard zip line be? As long as your two solid anchor points and a genuinely clear corridor allow, and no longer. Buy the length band that covers your measured distance with the slack allowance in the manual.
Do zip line kits come with a brake? Better kits include a spring brake or bungee brake. Some budget kits ship with a stop block only, which is not the same thing, so check the parts list before ordering and treat a missing brake as a reason to look at another kit.
Can you attach a zip line to a tree? Yes, with tree saver straps rather than cable wrapped around the bark, and only if the tree is genuinely suitable. A certified arborist is the right person to judge trunk size, species, lean, and root health.
What weight can a backyard zip line hold? Whatever the manufacturer states for that specific kit, which depends on cable diameter, hardware rating, and span. Do not infer a limit from a similar looking kit, and do not let adults test a line rated for children.
The Bottom Line
Choose a backyard zip line kit on three things: a real braking system included in the box, cable and hardware ratings stated by the manufacturer, and tree saver straps or clear post instructions for the anchors. Measure your run first, keep the whole corridor clear rather than just the ends, and take every height, slope, tension, and weight figure from your own manual.