Last updated: August 18, 2026
Knowing how to seal and paint a playhouse is the difference between a timber structure that looks tired after two summers and one that still closes properly a decade later. Wood in a backyard fails from water and sun, in that order, and a finish applied at the right moment stops both before the damage starts rather than after.
This walkthrough covers which finish suits a playhouse, how to prepare new and weathered timber, the order to work in on an already assembled house, and how to handle the child safety side of it without pretending to know what is in a can you have not read. The short version of that last point: the label is the authority, not a blog.
This article contains affiliate links. If you buy through them, we may earn a commission at no extra cost to you. Learn more.
Quick Answer
How do you seal and paint a wooden playhouse?
- Do it before the first winter, not after the wood looks weathered. New timber takes a finish far better than grey, cracked timber does.
- Choose one system and stay inside it: a clear or tinted exterior sealer, an exterior stain, or an exterior primer plus paint. Mixing systems is where finishes peel.
- Read the can for the manufacturer’s own guidance on use around children and on how long the finish must dry and cure before the house is used again.
- Seal the end grain and the underside of the base. Those two surfaces take on most of the water and are the ones nearly everybody skips.
Sealer, Stain or Paint: Which Finish for a Playhouse
All three protect the wood; they differ in how much of the grain they hide and how they fail. A clear sealer shows the timber and needs refreshing most often, a stain adds colour and lasts longer, and paint covers completely and lasts longest but peels rather than fading when it eventually goes.
| Finish | What it does | Best suited to |
|---|---|---|
| Clear exterior sealer | Repels water and slows greying while leaving the grain visible | Cedar or another attractive species you want to keep looking like wood |
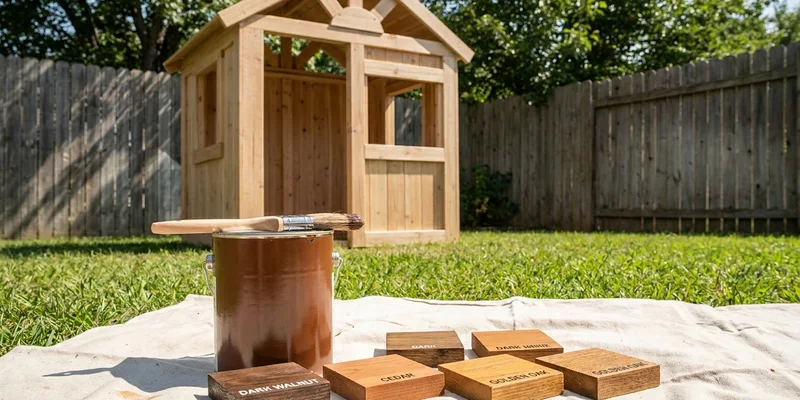
| Exterior stain | Adds colour and water resistance, wears back gradually rather than peeling | Most timber playhouses, and the easiest system to refresh later |
| Exterior primer plus paint | Covers the grain completely and gives the longest interval between coats | Softwood kits, and houses a child wants in a specific colour |
| Nothing at all | Leaves the wood to grey and check on its own | Only pressure treated or naturally durable timber, and even then it ages faster |
If the house is still in its box or you are choosing between finished and unfinished, our guide to a wooden playhouse kit covers that decision before the sanding starts.
Choosing a Finish for a Structure Children Use
Buy a product whose own label addresses use on children’s items and outdoor play equipment, and follow that label rather than a rule of thumb. Manufacturers state what their product is suitable for, how long it must dry, and how long before the surface can be handled, and that information is specific to the formulation in the can.
The regulatory backdrop is worth knowing. The Consumer Product Safety Commission restricts lead in paint and in surface coatings on children’s products in the United States, which is why coatings intended for such use say so on the packaging. If a can is silent on the question, treat that as an answer and choose a product that is explicit instead.
Drying Is Not Curing
A finish that is dry to the touch is not necessarily cured. Labels typically give a separate figure for full cure, and letting the house stand unused for that period is the simplest safety step in the whole job. Work in ventilated conditions, keep children and pets away while you apply and while it dries, and store leftovers out of reach.

Preparing the Surface
Preparation decides how long the finish lasts, and it takes longer than the painting does. The goal is a clean, dry, lightly abraded surface with no loose fibres, no mill glaze on new timber and no flaking material on old timber. Anything left on the surface takes the new coat off with it when it fails.
New Timber
Sand lightly to knock back mill glaze and any raised grain, then remove all dust with a brush and a damp cloth. New wood needs to be dry rather than freshly delivered and damp, so give a rained on kit a couple of dry days before you start. Fill any splits with exterior filler at this stage, not after the first coat.
Weathered Timber
Scrape or sand back anything loose, wash the surface with a wood cleaner rather than a pressure washer at close range, and let it dry thoroughly. Pressure washing raises the grain and drives water deep into the boards, which then has to come out again before any finish will bond.
The Order to Work In
Finish the pieces you cannot reach later first. On a kit that is not yet assembled, coat every face of every board including the end grain and the underside of the base, then build. On a house already standing, work top down so drips land on unfinished surfaces rather than on coats you have just laid.
End grain is the priority in both cases. The cut ends of boards absorb many times more water than the faces do, and they are the first place rot appears on a playhouse, particularly where a post or a base rail meets the ground.
Applying the Finish Well
Thin coats, more of them. Two or three light coats bond better and last longer than one heavy coat, which skins over and traps solvent underneath. Brush into the joints and around fasteners, then lay off in the direction of the grain so the surface texture is consistent.
A brush is the most reliable tool on a structure with this many edges and corners, though a sprayer saves real time on large flat panels and lattice. If you spray, back brush while the material is still wet so it is worked into the grain rather than sitting on top of it.

Timing, Weather and How Often to Redo It
Pick a stretch of dry, mild weather and start early enough in the day that the last coat has hours of daylight to dry. Most exterior finishes state a minimum and maximum application temperature and a warning about applying in direct sun or with rain forecast, and those limits are on the can for good reason.
How often you redo it depends on the finish and the exposure rather than on a calendar. Inspect each spring: a sealer that no longer beads water, a stain that has worn thin on the sun facing side, or paint that is flaking anywhere are all telling you the same thing. Recoating at that point is a light job, while waiting until the wood has greyed and split turns it into a preparation project.
Common Mistakes to Avoid
- Waiting until the house looks weathered. The first finish should go on before the first winter, while the timber is still sound.
- Skipping the end grain and the underside. These take on most of the water and cause most of the rot.
- Pressure washing at close range. It raises the grain, damages softwood and pushes water into the boards.
- Mixing incompatible products. Putting a different system over an existing one without stripping or priming is the usual cause of peeling.
- Painting over damp or dusty wood. Both prevent the coat from bonding, and neither is visible once the finish is on.
- Letting children use the house before the label says it is cured. Dry to the touch and fully cured are different milestones.
Frequently Asked Questions
Do you need to seal a wooden playhouse? In almost every case, yes. Untreated timber greys, checks and eventually rots where it meets the ground, and a finish applied while the wood is still new is far more effective than one applied after weathering has started.
What paint is safe for a children’s playhouse? Use a product whose own label states it is suitable for children’s items or outdoor play equipment, and follow the manufacturer’s directions for application, drying and cure time. The Consumer Product Safety Commission restricts lead in paint and surface coatings on children’s products, which is why suitable coatings say so on the packaging.
Should you stain or paint a playhouse? Stain is the easier long term choice because it wears back gradually and can be refreshed without stripping. Paint covers completely and lasts longer between coats, but when it eventually fails it peels, which means real preparation work before recoating.
Can you paint a plastic playhouse? It is rarely worth it. Molded plastic panels need a specific plastic primer and still tend to chip where children climb and lean, and any coating adds a maintenance job to a house whose main appeal was that it needed none.
How long should a playhouse dry before children use it? Follow the cure time on the can rather than the dry to touch time, and keep children away for the full period stated. Ventilation while it dries and storing leftover product out of reach are both worth doing as a matter of course.
How often should you reseal a playhouse? Inspect every spring and recoat when water no longer beads on the surface, when the sun facing side has worn thin, or at the first sign of flaking. That is a lighter job than any fixed schedule, and it catches problems while the timber is still sound.
The Bottom Line
Finish the house early, prepare properly, and put the effort into the surfaces nobody sees. Choose one system and stay in it, read the can for the manufacturer’s guidance on use around children and on cure time, and coat the end grain and the underside of the base before anything else. Then check it each spring and recoat at the first sign of the finish giving up, which is a fraction of the work of rescuing weathered timber.